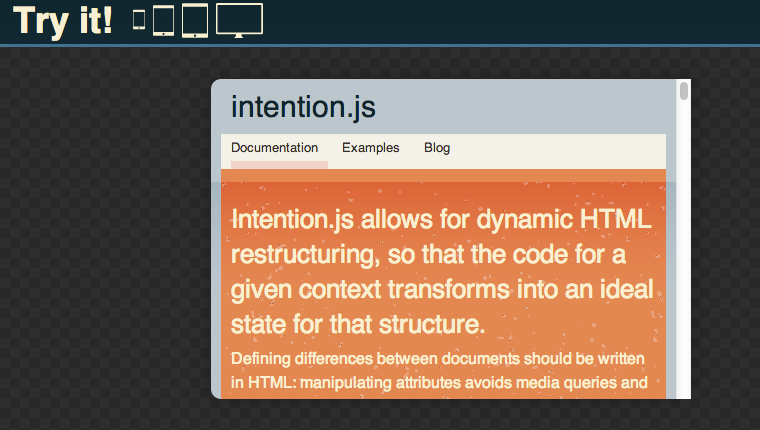
It’s only fair that a site promoting a responsive web design tool should itself be… you know, responsive. So that’s what we did. Hopefully you noticed on the documentation overview that you can preview what the site looks like in different horizontal axis contexts (mobile, 7” tablets, tablets, etc.). You can also manually resize your window to see how things shift around. The most interesting changes happen on that documentation page, so let’s break them down.
First of all, let’s discuss how the page is structured
<div id="all" intent in-width: in-container:>
   <header intent in-width: in-container:>
      …
   </header>
   <section id="splash" intent in-width: in-container:>
      …
   </section>
   <section id="codeImage" intent in-width: in-container:>
      …
   </section>
   <section id="smallCode" intent in-width: in-container:>
      …
   </section>
   <section id="heading">
      …
   </section>
   <nav id="topNav" intent in-width: in-container: in-orientation>
      …
   </nav>
   <section id="content" intent in-width: in-container:>
      <nav id="prevnext" intent in-width: in-container:>…</nav>
      <nav id="leftNav" intent in-width: in-container:>…</nav>
   </section>
</div>
Right off the bat, you can see there are a lot of instances of intent in-width: in-container:. Of course, you could use #all as the main intentional element, and style all of its children according; but that’s a matter of preference. Here, we are marking the flagging the major elements as intentional so that in our CSS we can be compact and succinct. (Rather than styling things #all.standard header { … } we will use header.standard).
Let’s start with the top and go down.
<div id="all" intent in-width: in-container:>
   …
</div>
We are using a wrapper that basically is emulating the body tag. As an element we can control its size—and subsequently manipulate its children—without affecting the browser window’s size. With this pseudo-body element, we can create a custom axis container_width that serves the same function as the default window width horizontal_axis included in Context.js (hence the in-container:).
var container_width = intent.responsive({
   ID: 'container',
   contexts: [
      {name:"pseudohdtv",min:1220},
      {name:"pseudostandard",min:840},
      {name:"pseudotablet",min:768},
      {name:"pseudosmalltablet",min:510},
      {name:"pseudomobile",min:0}
   ],
   matcher: function(test, context) {
      if(typeof test === 'string'){ return test === context.name;   }
      return test >= context.min;
   },
   measure:function(arg) {
      if(typeof arg === 'string'){ return arg; }
      return $("#all").width();
   }
});
$('#devices').children().click(function(){
   var device = $(this).attr('id');
   intent.axes.container.respond(device);
});
Forcing a context to pass true
In this axis, which measures the wrapper #all’s width, we don’t respond on window resize. Instead, when an element is clicked, we take that element’s ID and force the container_width axis to respond and accept the context we pass in. Specific parts of the measure and matcher functions let us do this.
…
matcher: function(test, context) {
   if(typeof test === 'string'){
      return test === context.name;
   }
   return test >= context.min;
},
measure:function(arg) {
   if(typeof arg === 'string'){
      return arg;
   }
   return $("#all").width();
}
…
Before the measure function begins to measure the wrapper’s width, it first checks to see if it has been passed a string. In instances like this, that’s likely true.
intent.axes.container_width.respond('pseudomobile')`The measure function then returns that value to the matcher function, which compares it against the values set up in the contexts array. It too, though, first checks to see if the value passed to it is a string instead of a number (which it would a width measurement would likely be). If that is the case, the matcher function will return the context that has a name value that matches the string passed in.
Back to the HTML, we see that the wrapper #all is flagged as responsive in-container:. Therefore, when a container_width context is passes, its name will be assigned to #all as a class. In general, those classes are a set of width and height values that “shrink” the viewport and have the layout adjust accordingly. In our CSS, we write the mobile stylings to also include “pseudo” contexts.
Current Position Navigation
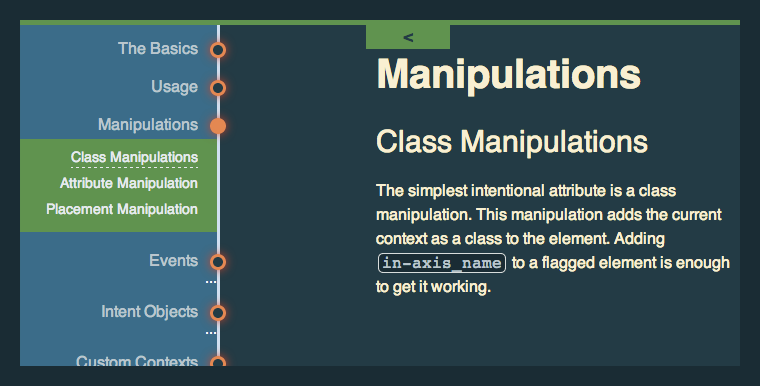
If you have the luxury of using a luxury display (window width > 1300), you’ve likely seen the document tree navigation that floats on the left the documentation. As you scroll, you see that the circle nodes “light up” to indicate your current position in the document. When they become active, a submenu will sometimes open and show subsection of an article. This is done with a custom scroll depth axis that has its contexts generated with Javascript.
<div id="docs">
   <article>
      <h2>The Basics</h2>
      <section><!-- Documentation content --></section>
   </article>
   <article>
      <h2>Manipulations</h1>
      <article>
         <h3>Class Manipulations</h3>
         <section> <!-- Documentation info --></section>
      </article>
   </article>
</div>
The basic structure for the documentation is a series of articles that begin with an h2 and contains sections of documentation relevant to the title. Sometimes an article will contain other articles. This is for larger sections of documentation that must be divided into subsections.
var titleCtx = [],
   i = 1;
In Javascript, we first set up an empty array and set a variable i that will be used for keep tracking of iterations.
$.each($('#docs').children('article'), function() {
   $(this).attr('id', 't'+i);
   var text = $(this).children('h2').text(),
      markup = '<li id="a'+i+'" \
         intent in-width: \
         in-t' + i + '-class="active"> \
         <div class="label"> \
            <a href="#t'+i+'">'+text+'</a>
         </div>
         <div class="circle"></div>
      </li>',
      pos = $(this).offset().top,
      ctx = {name:'t'+i, val:pos}; //an object that will be part of the 'contexts' property of the custom axis

   titleCtx.push(ctx);
   $('#leftNav ol').append(markup);
   intent.add($('#leftNav #a'+i));

   i++;
});
Okay, that was a huge chunk but let’s get through it.
Firstly, are going to get a bunch of information from each article. We get the title of each article as a string, and we create the markup for a list item that will be part of the nav. Each article will be assigned an ID using i (#t1, #t2, etc) that will increment with each article.
var markup = '<li id="a'+i+'" \
   intent in-width: \
   in-t'+i+'-class="active"> \
      <div class="label"><a href="#t'+i+'">'+text+'</a></div> \
      <div class="circle"></div> \
   </li>',
Each li will have an ID that identifies it as an anchor, incremented for each article (a list item referencing the third article #t3 will have an ID of #a3). Within each li we will use the article’s title as a link that points to the article’s target ID (#a3 links to #t3). These list items are then appended to a preexisting <nav id="leftNav"></nav>.
Each one of these list items will also be intentional. If we’re within the threshold of the appropriate context’s scroll depth values, the list item will be assigned the class “active”. More explicitly, when we create the custom axis, each context will have a name that corresponds to an article. The context list will end up looking like
contexts: [
   {name:t1, val:100},
   {name:t2, val:200},
   {name:t3, val:300}
]
So when we create the list items, we want each nth-child (kept count by i) to be linked the nth context. Hence, in-t' + i + '-class="active".
Adding intentional element after the DOM is loaded
...
intent.add($('#leftNav #a'+i));
...
By the time this script runs, Intention.js and Context.js have already crawled the DOM and found elements that were flagged intentional. Using Javascript to add an element that includes an intentional flag will not add the element to Intention’s registry. We must add the element with intent.add().
...
pos = $(this).parent().offset().top,
ctx = {name:'t'+i, val:pos},
...
We will also get the article’s position from the top, relative to the window. The target name and the target’s position are then used to create an object that will be used in the array of contexts in the scroll depth axis. The article’s position will be the value against which the user’s scroll depth will be compared. Each object is added to the array we declared earlier, titleCtx.
...
i++;
...
Of course, we increment i so that each list item and article doesn’t have the same name.
titleCtx.reverse();As we iterated through each article, the loop went straight down the DOM. article elements that appeared earlier than other were of course iterated first. But in our custom axis, we don’t want the first context to be the smallest scroll depth value, because that context will pass true and Intention will exit the array. Instead, we want to reverse the $.each loop’s order so that highest value scroll depths come first, and lower scroll depth values come last.
Constructing the scroll depth axis
Now, we have an array of axis (with name and value properties) in a proper order that we can simply place into a custom axis.
var B = document.body,
      D = document.documentElement,
      D = (D.clientHeight)? D: B;

var titleDepth = intent.responsive({
      ID: 'titleDepth',
      contexts: titleCtx,
      matcher: function(test, context){
         return test >= context.val;
      },
      measure: function(arg){
         if(typeof pageYOffset == 'undefined') { var scroll = D.scrollTop; }
         else { var scroll = window.pageYOffset; }
         return scroll;
      }
   });
titleDepth.respond();
$(window).on('scroll', function(){
   throttle(titleDepth.respond(), 50);
   //throttle is a function inside Context.js that limits the calculations that should be done per second
});
We create an axis for the each article’s scroll depth called titleDepth. In the contexts property of the object, we place in the complete array of article targets and scroll depth values.
Everytime the user scrolls, Intention looks at the window.pageYOffset value and compares it against the values in titleCtx. As soon as it passes true, it sets that as the current scroll depth context intent.axes.titleDepth.current
(Note: IE8 doesn’t recognize window.pageYOffset, so we must first see if that value is undefined and unreachable. If that’s the case, we should instead get the document’s scrollTop value relative to the document body. You can really just plop in the code written to make that decision.)
When a context passes true, the corresponding navigation list item is assigned the class ‘active’ and it completes the circle.
Of course, as this is an $.each loop, the scroll depth axis is infinitely expandable with the documentation’s content.